Thanks to our recent post on photographing your artwork, you should have true-to-life depictions of your artwork. To make them polished and professional-looking, all you have to do is make a few easy adjustments in the “digital darkroom.” Here are 8 simple but effective photo editing tips to set you up for success!
Crop your Image
- Crop down your image so you see only the work, nothing more.
- Remove the background and make sure you don’t crop into the edge of your works!
TIP: If your artwork was positioned slightly at an angle, a rectangular crop will not give you an even cut. Rotate the canvas of your photo editor to get the work on the proper axis to crop evenly.
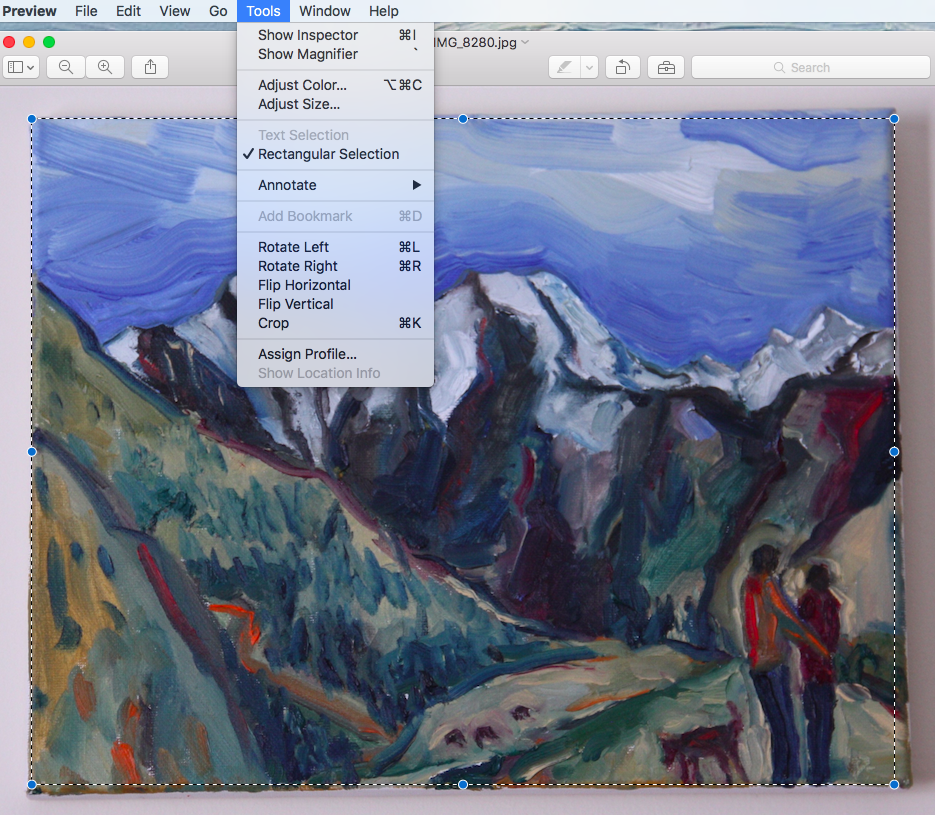
- Open your image in Preview.
- Drag your cursor over the work to create the cropped shape.
- Select crop under Tools.
Correct Colors
Do your images’ whites look a bit yellowish or blueish? Despite your best efforts to adjust your white balance and avoid mixed light sources, the colors in your photo may still be a bit off when you view them on your computer. You can adjust color with the white balance, hue and saturation tools in your photo editor to accurately reflect the real-life colors of the work.
Adjust Brightness & Contrast
If you didn’t get your exposure right in-camera, fear not! You can easily adjust in your photo editor. If there was not enough light at the time you took the photo and your image is too dark, boost brightness.
Adjust the contrast filter if you have a detail shot or a 3D work that needs to showcase form.
In Lightroom: Exposure and Contrast are two sliding adjustments on the right tool bar.
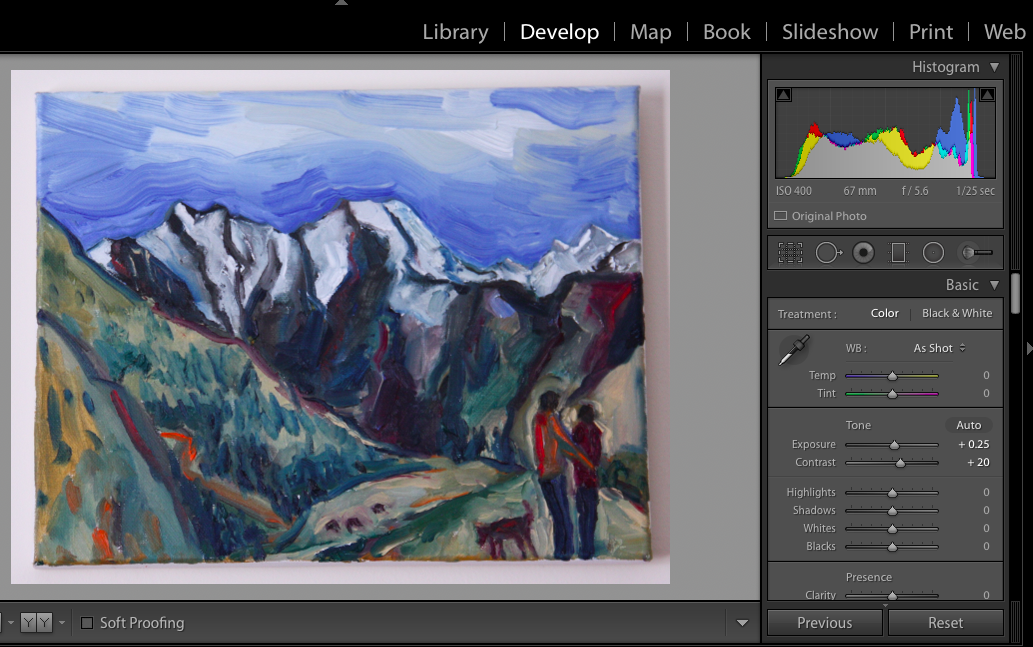
Sharpen to Reduce Blur and Grain
Photo editing softwares like Lightroom and Photoshop will have a sharpening feature to reduce any blur or camera shake that may have occurred while taking the photo.
In Lightroom, the sharpening feature is on right side toolbar, under Detail.
You can also reduce noise if your ISO was set too high and your image is grainy. This tool is also found under Detail in Lightroom.
Resize the Image
You’ll want to resize your photo to a smaller size and resolution so that you can quickly send your photos to potential buys and submit to juried shows and competitions.
Your photos come off your digital camera in large dimensions measured in pixels (px). Resize your image so that the longest side is at least 1920 pixels – that is the minimum size for online juried shows and a CaFÉ requirement.
Don’t forget to change the resolution! If your photo is only being used for the web, change the resolution to 72dpi. If it’s going to be printed, adjust the resolution to 300dpi.
DPI stands for dots per inch, and the higher the dpi, the better the photos will look when printed. But, if the dpi is too high and used on the web, your images will load much slower and slow down your website speed.
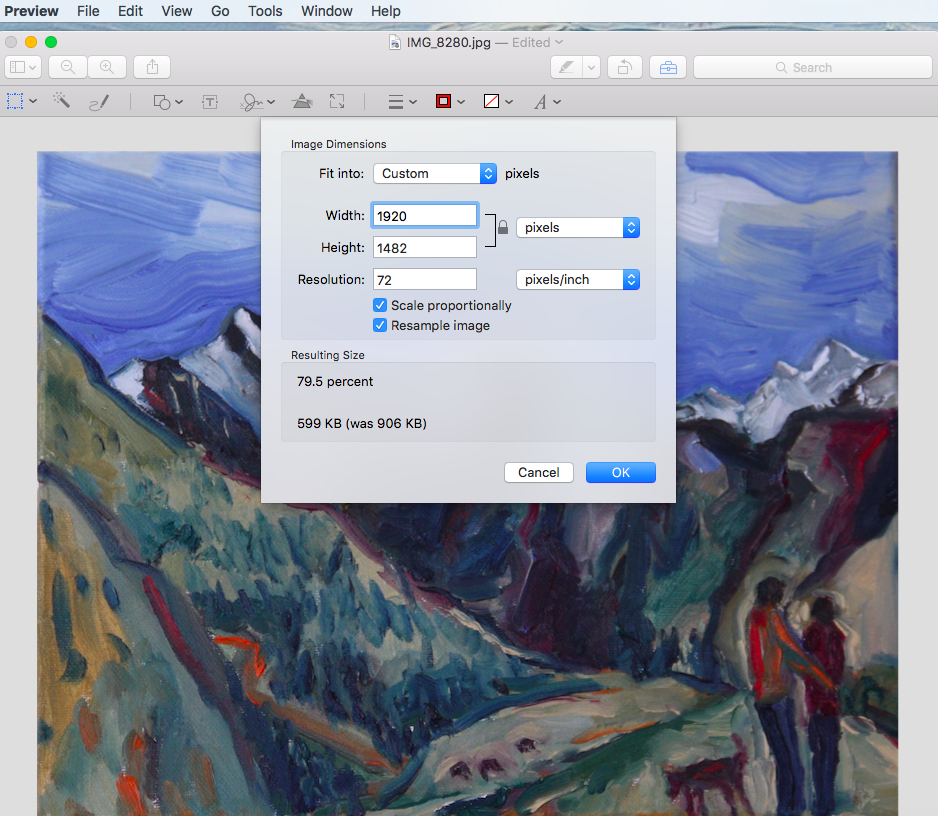
In Preview: Select “Adjust Size” under Tools. Make sure Scale proportionally and Resample image are both checked.
Save for Quality
Be sure to save your finished digital image as a TIFF or PSD so that you don’t lose any file quality. Save it again as a JPG if you will upload it to the internet.
Stay Organized
Make things easy for yourself and label each image consistently with detail. We suggest including title, medium, dimensions and year for the piece. Save yourself time and effort later; no one wants to hunt through hundreds of images.
Backup your Images
Go one step further and export your images to folders on your desktop, on a hard drive, and on the Cloud. Save batches in folders by year, medium, or theme. Don’t make me tell you the sad tale of a MacBook that died during grad school and the hundreds of lost photos.
Upload your photos to CaFÉ’s Portfolio so you have them ready for your submissions!
Tips
Most of these edits can be made in free software like GIMP. You can find a list of 5 free photo editing tools on CaFÉ’s blog. If you’d like more tools and features at your ready, you can invest in Adobe’s Lightroom and/or Photoshop. If you don’t want to drop that much cash, take a look at Photoshop Elements, a cheaper and lightweight version of its older siblings – Lightroom and Photoshop. You can try them all with Adobe’s 7-day free trial.
Written by Elysian Koglmeier