Organization Details
All of your organization’s account details are housed in the Organization Details page of the Account Manager’s profile. Note: General administrators do not have access to this page in CaFÉ.
How to Update the Contact & Billing Information:
- Log into your CaFÉ account.
- Click on the account icon next to your name in the top-right corner.
- Click Profile.
- Click the Organization Details tab to access the account details.
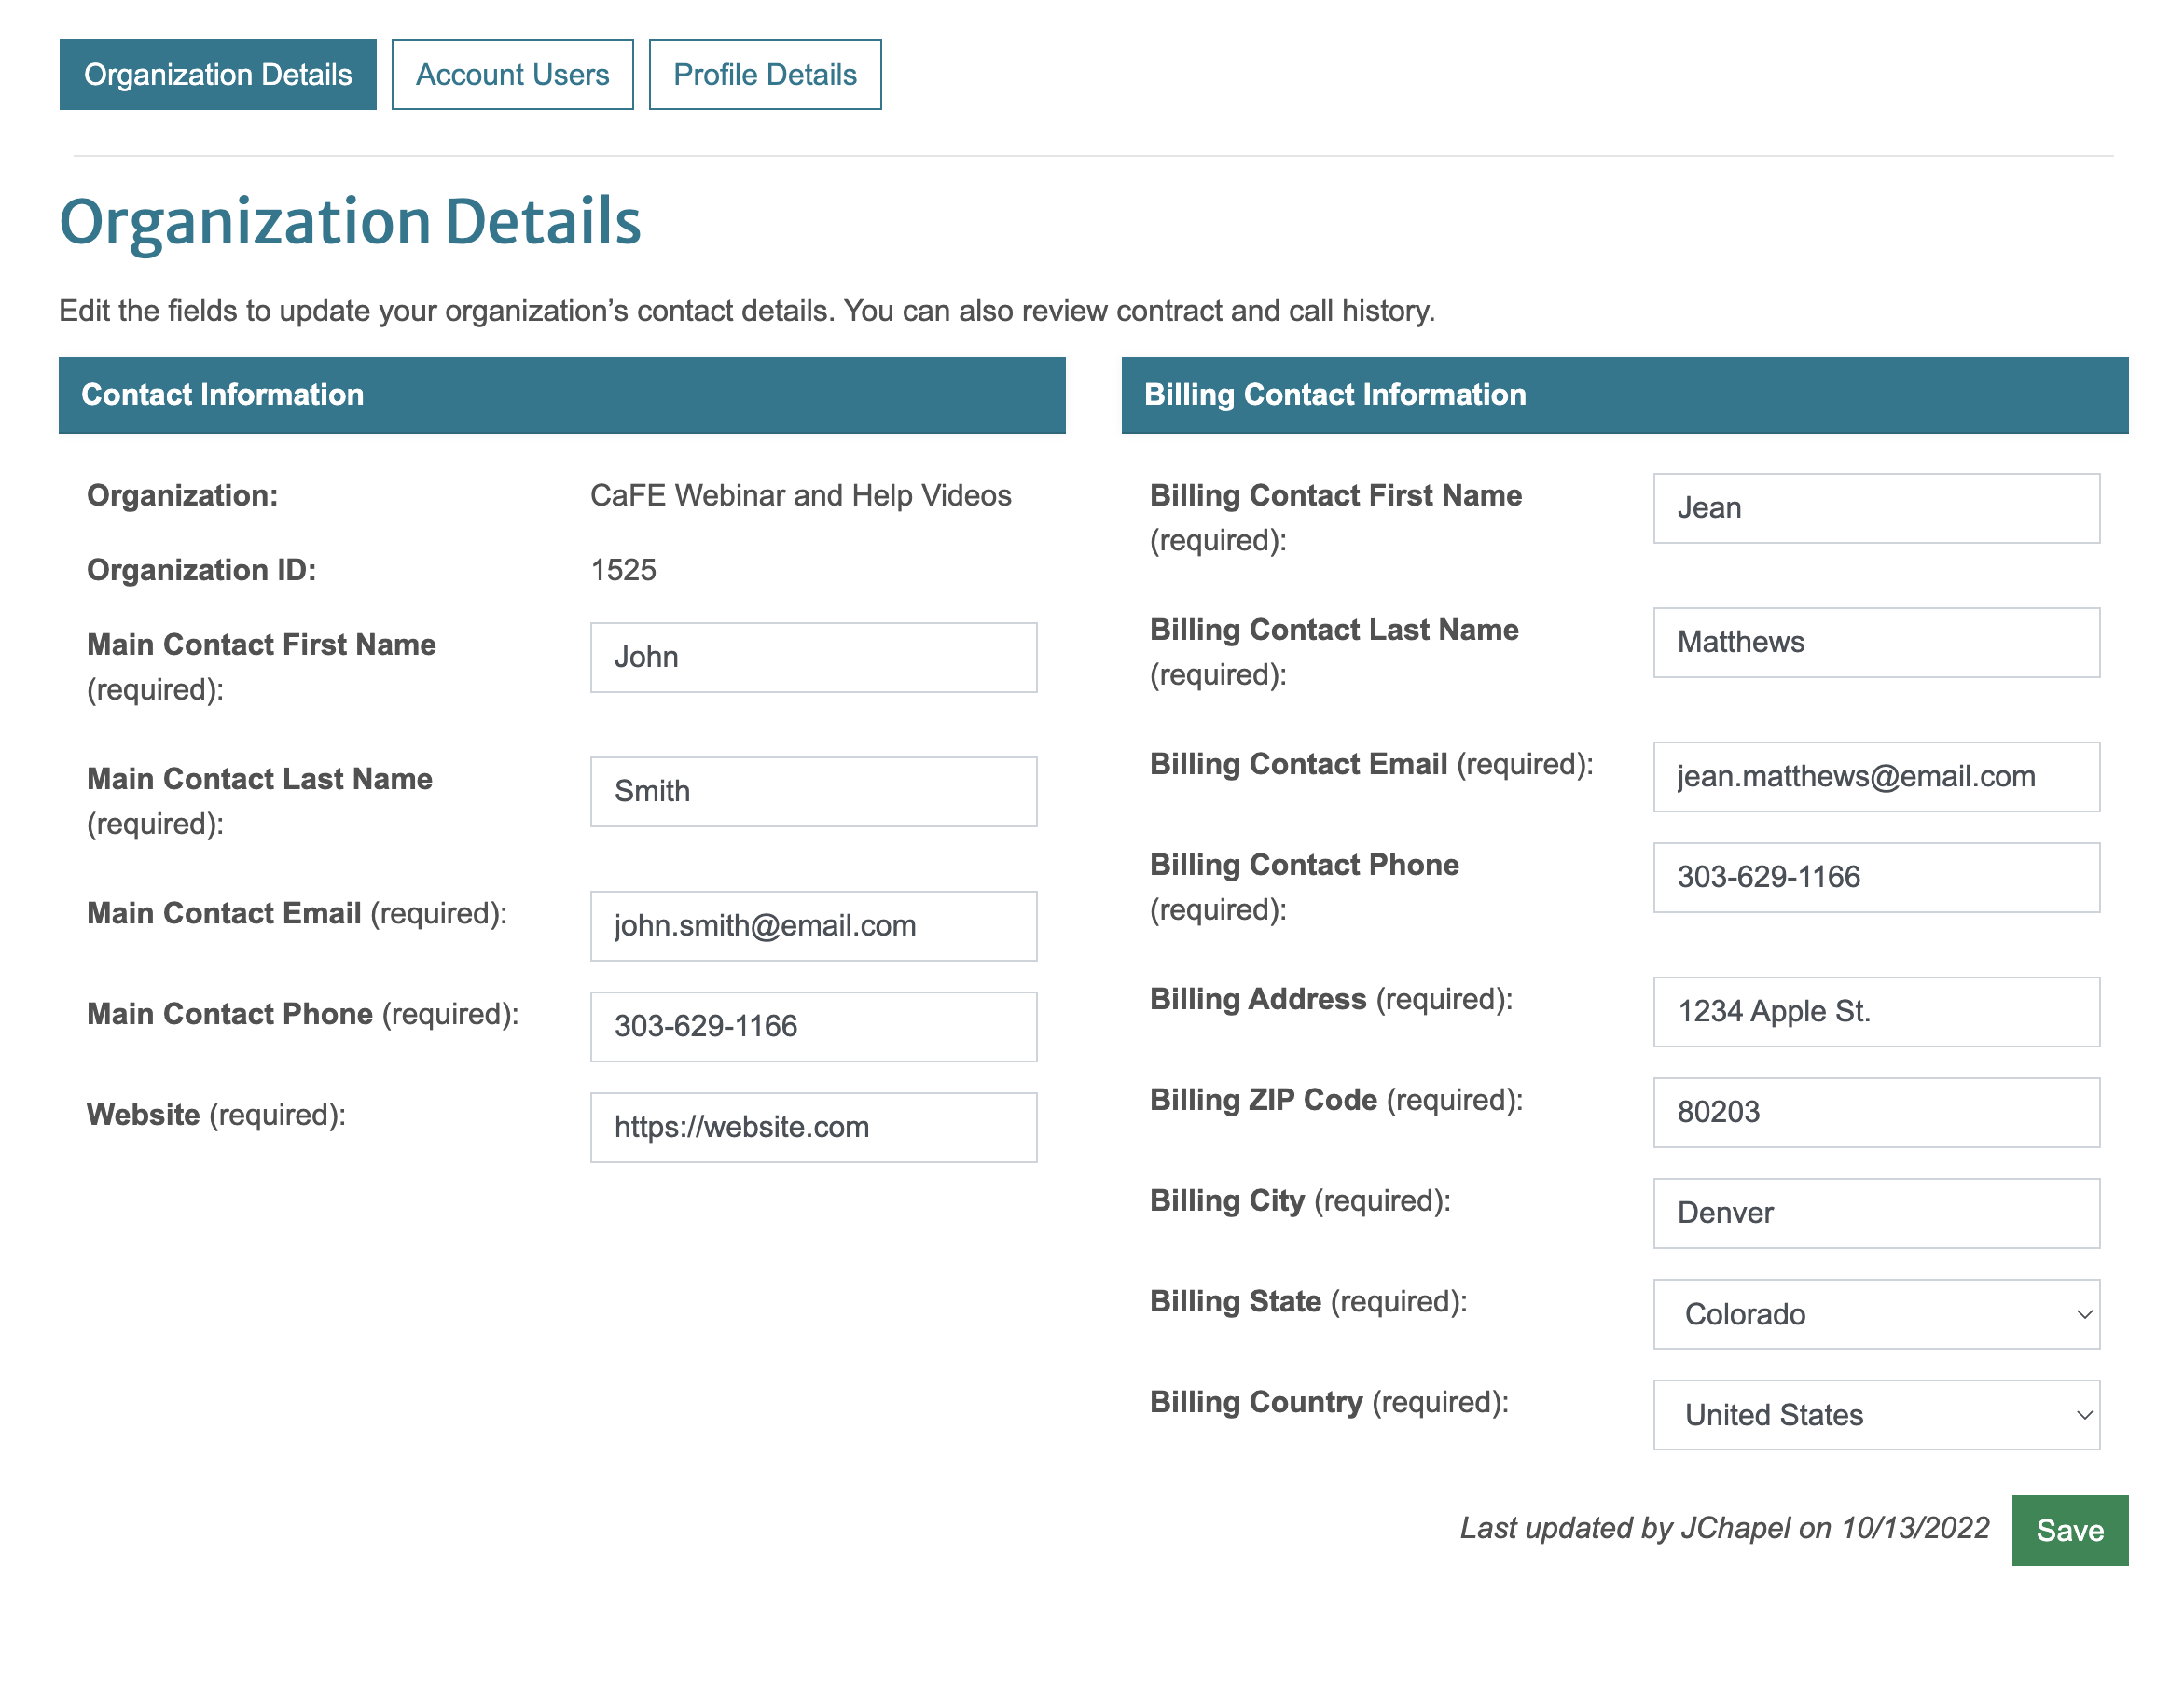
- Locate the Contact Information and Billing Contact Information section.
- Update the Main Contact as needed. The main contact is the appropriate person to discuss information about your account, call details, etc.
- Update the Billing Contact Information as needed. The billing contact is the appropriate person to discuss payment information. The billing address is the address used to send your monthly remittances (if collecting revenue).
- Click Save to finalize your changes.
Note: It’s important to keep your billing information up-to-date to ensure the revenue collected through CaFÉ is properly remitted to you.
Hover over the blue (+) icons to view the details of each field:
The main contact is the appropriate person to discuss information about your account, call details, etc.
The billing contact is the appropriate person to discuss payment information.
The billing address is the address used to send your monthly remittances (if collecting revenue).
Click save to save changes made to your organization details.
How to View Contract and Call History:
- Log into your CaFÉ account.
- Click on the account icon next to your name in the top-right corner.
- Click Profile.
- Click the Organization Details tab to access the account details.
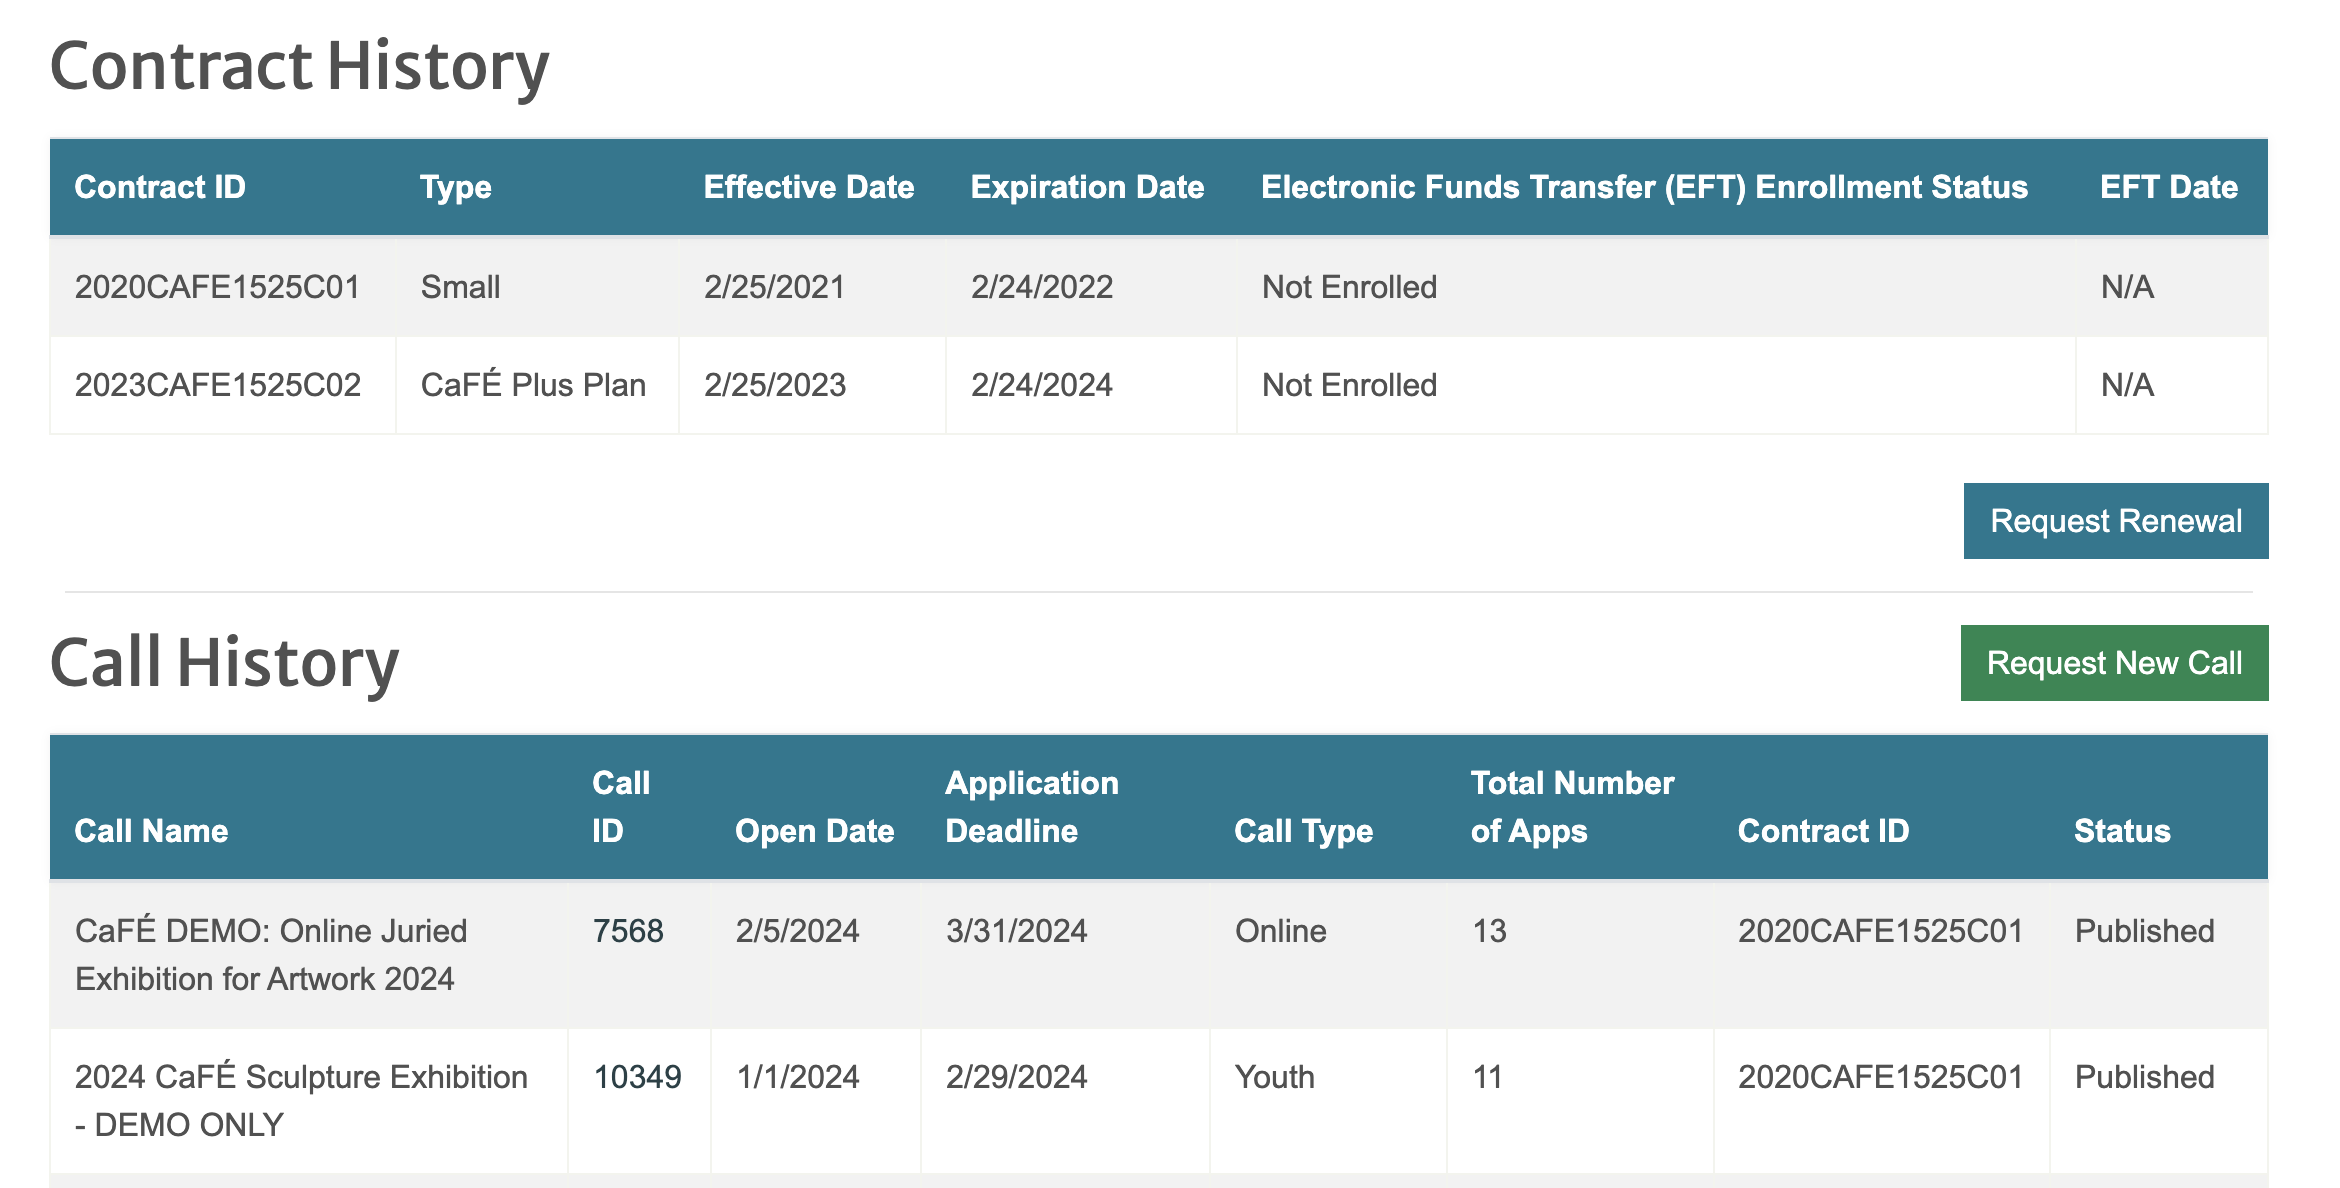
- Scroll down to the Contract History section to view the list of contracts for your organization, the dates effective, and the Electronic Funds Transfer (EFT) Enrollment Status.
- Click Request Renewal to notify the CaFÉ team that you would like to renew your account.
- Scroll down to the Call History section to view the list of calls for your organization.
- Click Request New Call and fill out the form to add a new call to your account. Note: By submitting the form you are agreeing to purchase a new call and will be billed accordingly.
Hover over the blue (+) icons to view the details of each field:
See the expiration date of your current contract.
View the status of your account’s Electronic Funds Transfer (EFT) Enrollment Status. If enrolled, your remittances will be electronically delivered to your bank account.
Click to Request Renewal submit a renewal request and the CaFÉ team will follow up to process your renewal.
Click Request New Call and fill out the subsequent form to add a new call to your account.
Account Users
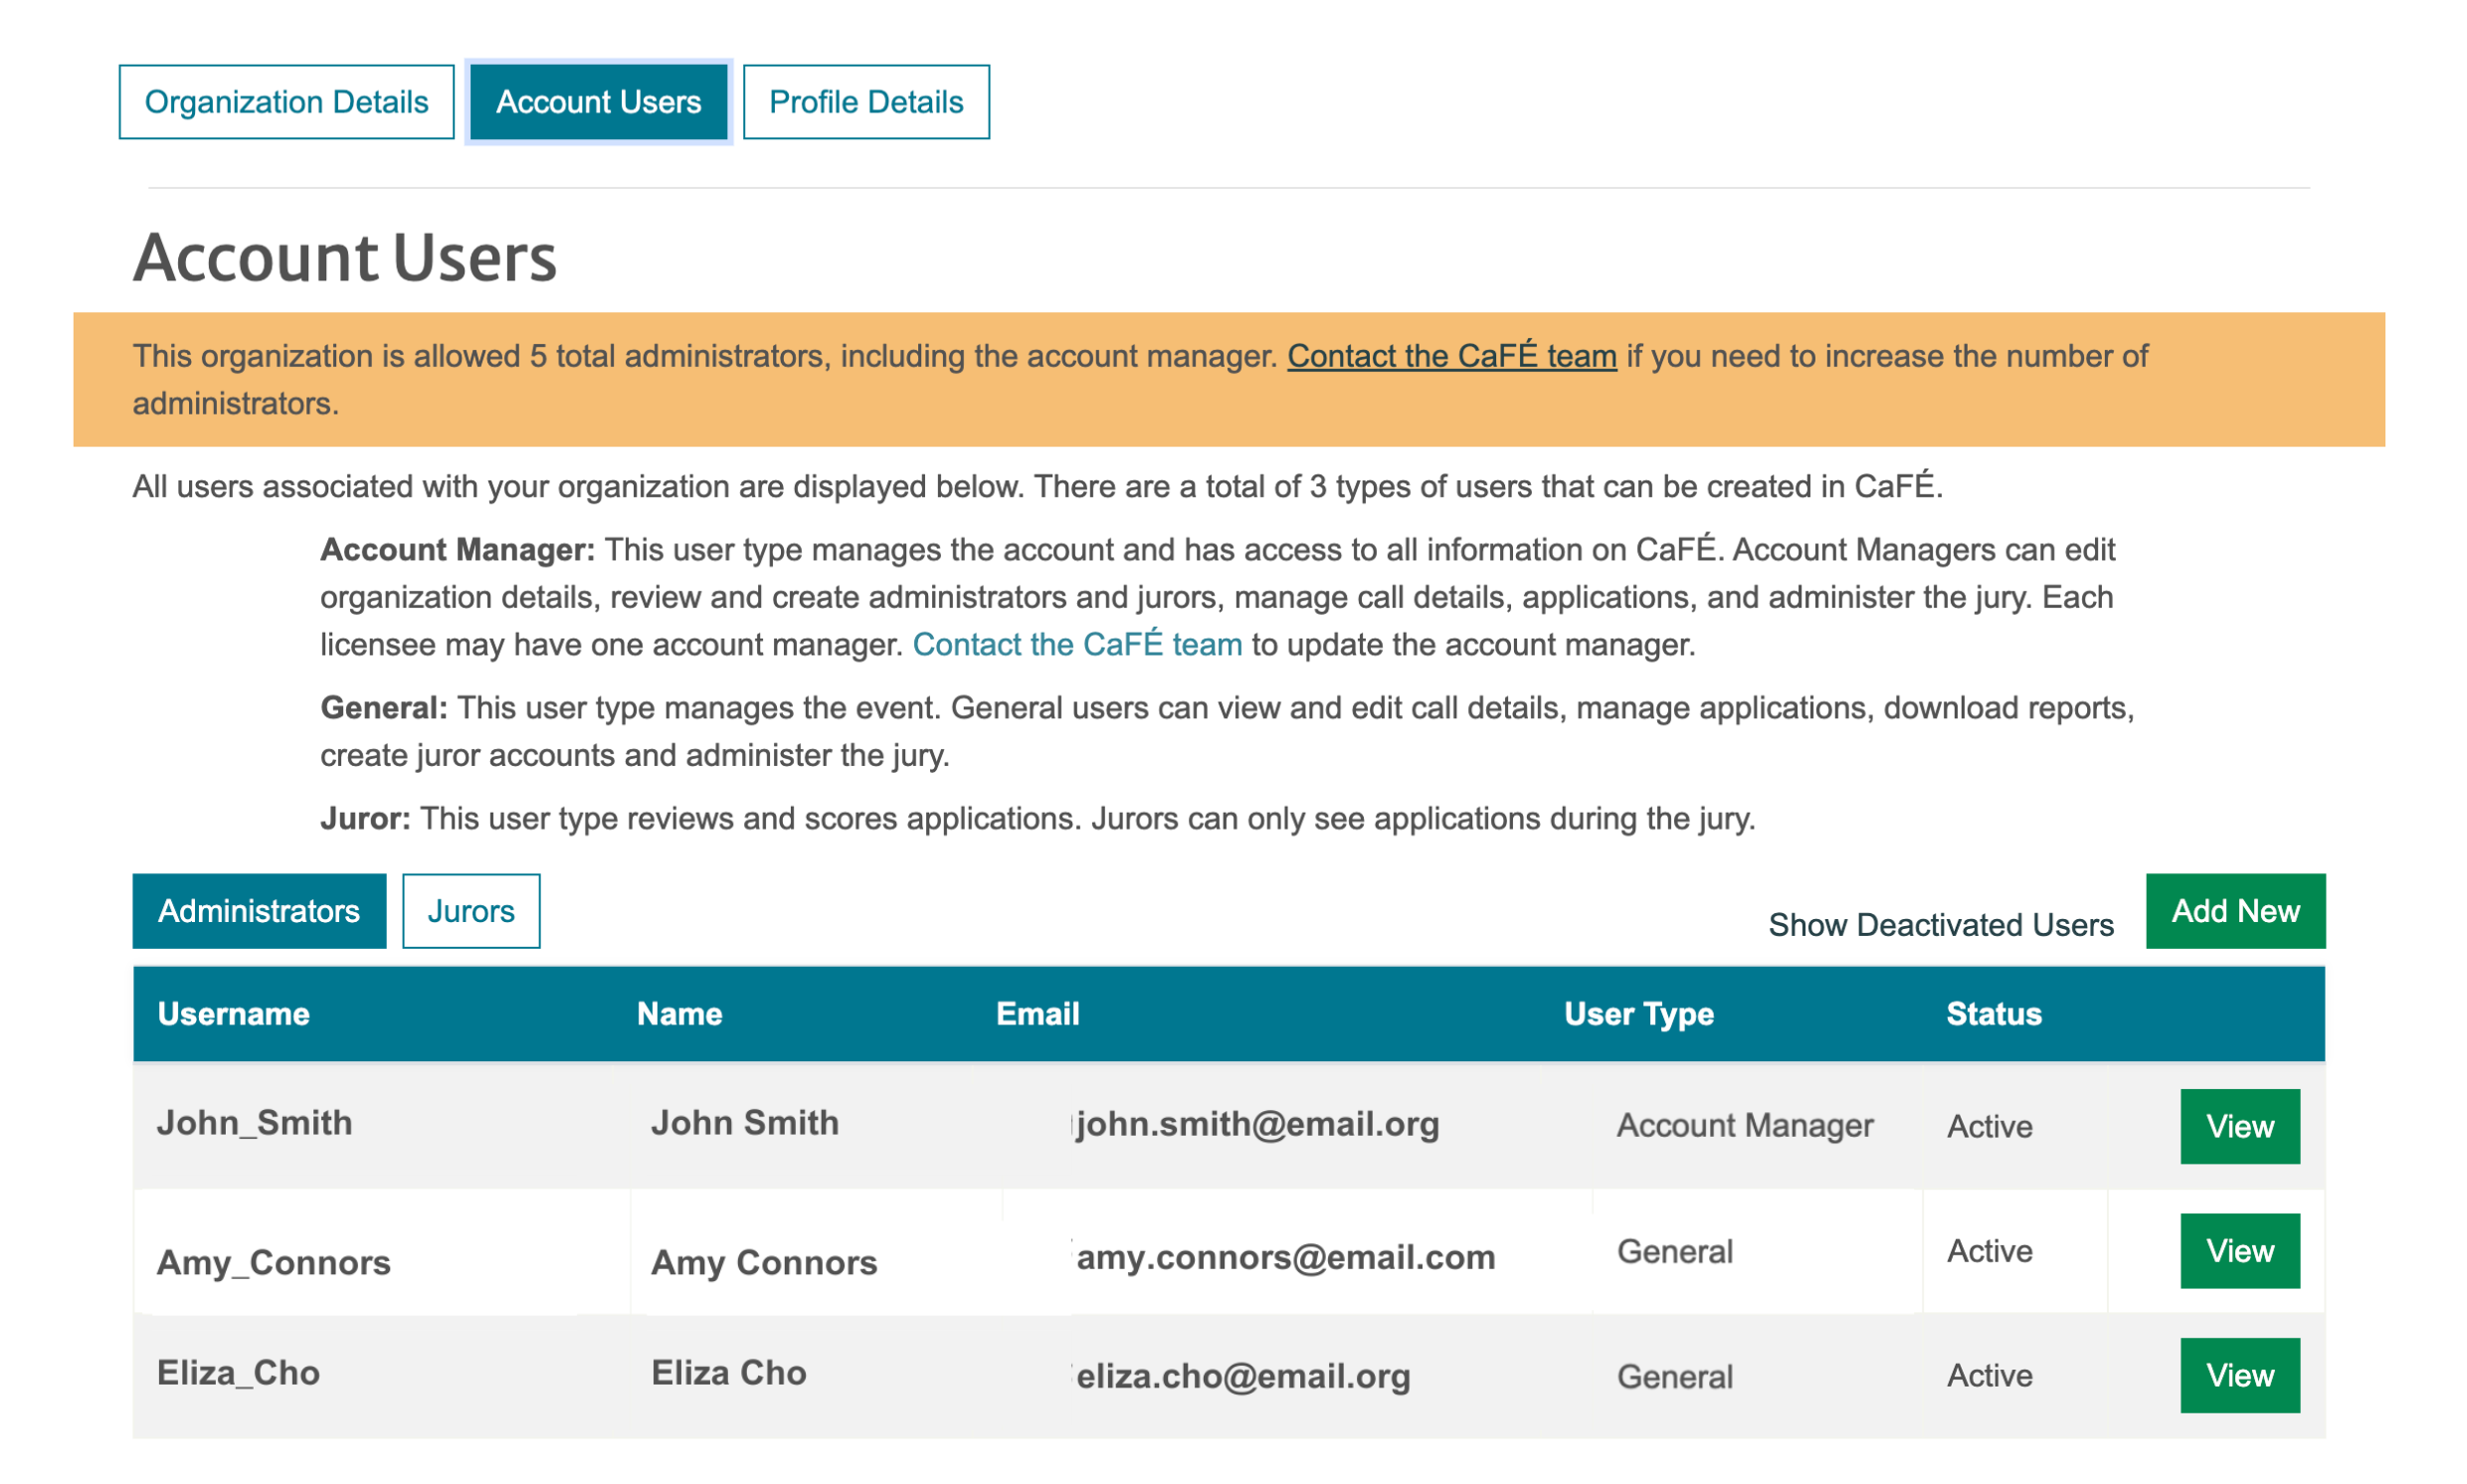
All administrators and jurors associated with your organization are displayed in the Account Users page of the Account Manager’s profile.
Each organization is entitled to a maximum of five (5) administrator accounts.
- One (1) account is designated for the Account Manager.
- The Account Manager can edit organization details, view and create users, manage call details and applications, download reports, and administer the jury.
- Contact the CaFÉ team to update the account manager.
- Four (4) accounts are designated for General Administrators.
- General administrators can manage call details and applications, download reports, create juror accounts, and administer the jury.
- Only account managers can create general administrator accounts.
How to View the List of Administrators & Jurors:
- Log into your CaFÉ account.
- Click on the account icon next to your name in the top-right corner.
- Click Profile.
- Click the Account Users tab.
- Click Administrators to view the list of active administrator accounts.
- Click Show Deactivated Users to view the list of deactivated accounts. Contact the CaFÉ team to reactivate an administrator account.
- Click View for any account to view the username and administrator details.
- Click Jurors to view the list of active juror accounts.
- Click Show Deactivated Users to view the list of deactivated accounts.
- Click View for any account to view the username and juror details.
- Click Edit to go to the Juror Editor and edit the details of the juror account.
- To reactivate a deactivated juror, change the Status to Active.
- To assign the juror to a call, check the box next to the call name.
- Click Save to save changes to the juror account.
Hover over the blue (+) icons to view the details of each field:
Click to view the list of administrators accounts.
Click to view the list of juror accounts.
Click to view the list of deactivated users.
Click to view the username and contact details for the account.
Click to add a new administrator or juror account.
How to Add a New General Administrator:
- Log into your CaFÉ account.
- Click on the account icon next to your name in the top-right corner.
- Click Profile.
- Click the Account Users tab.
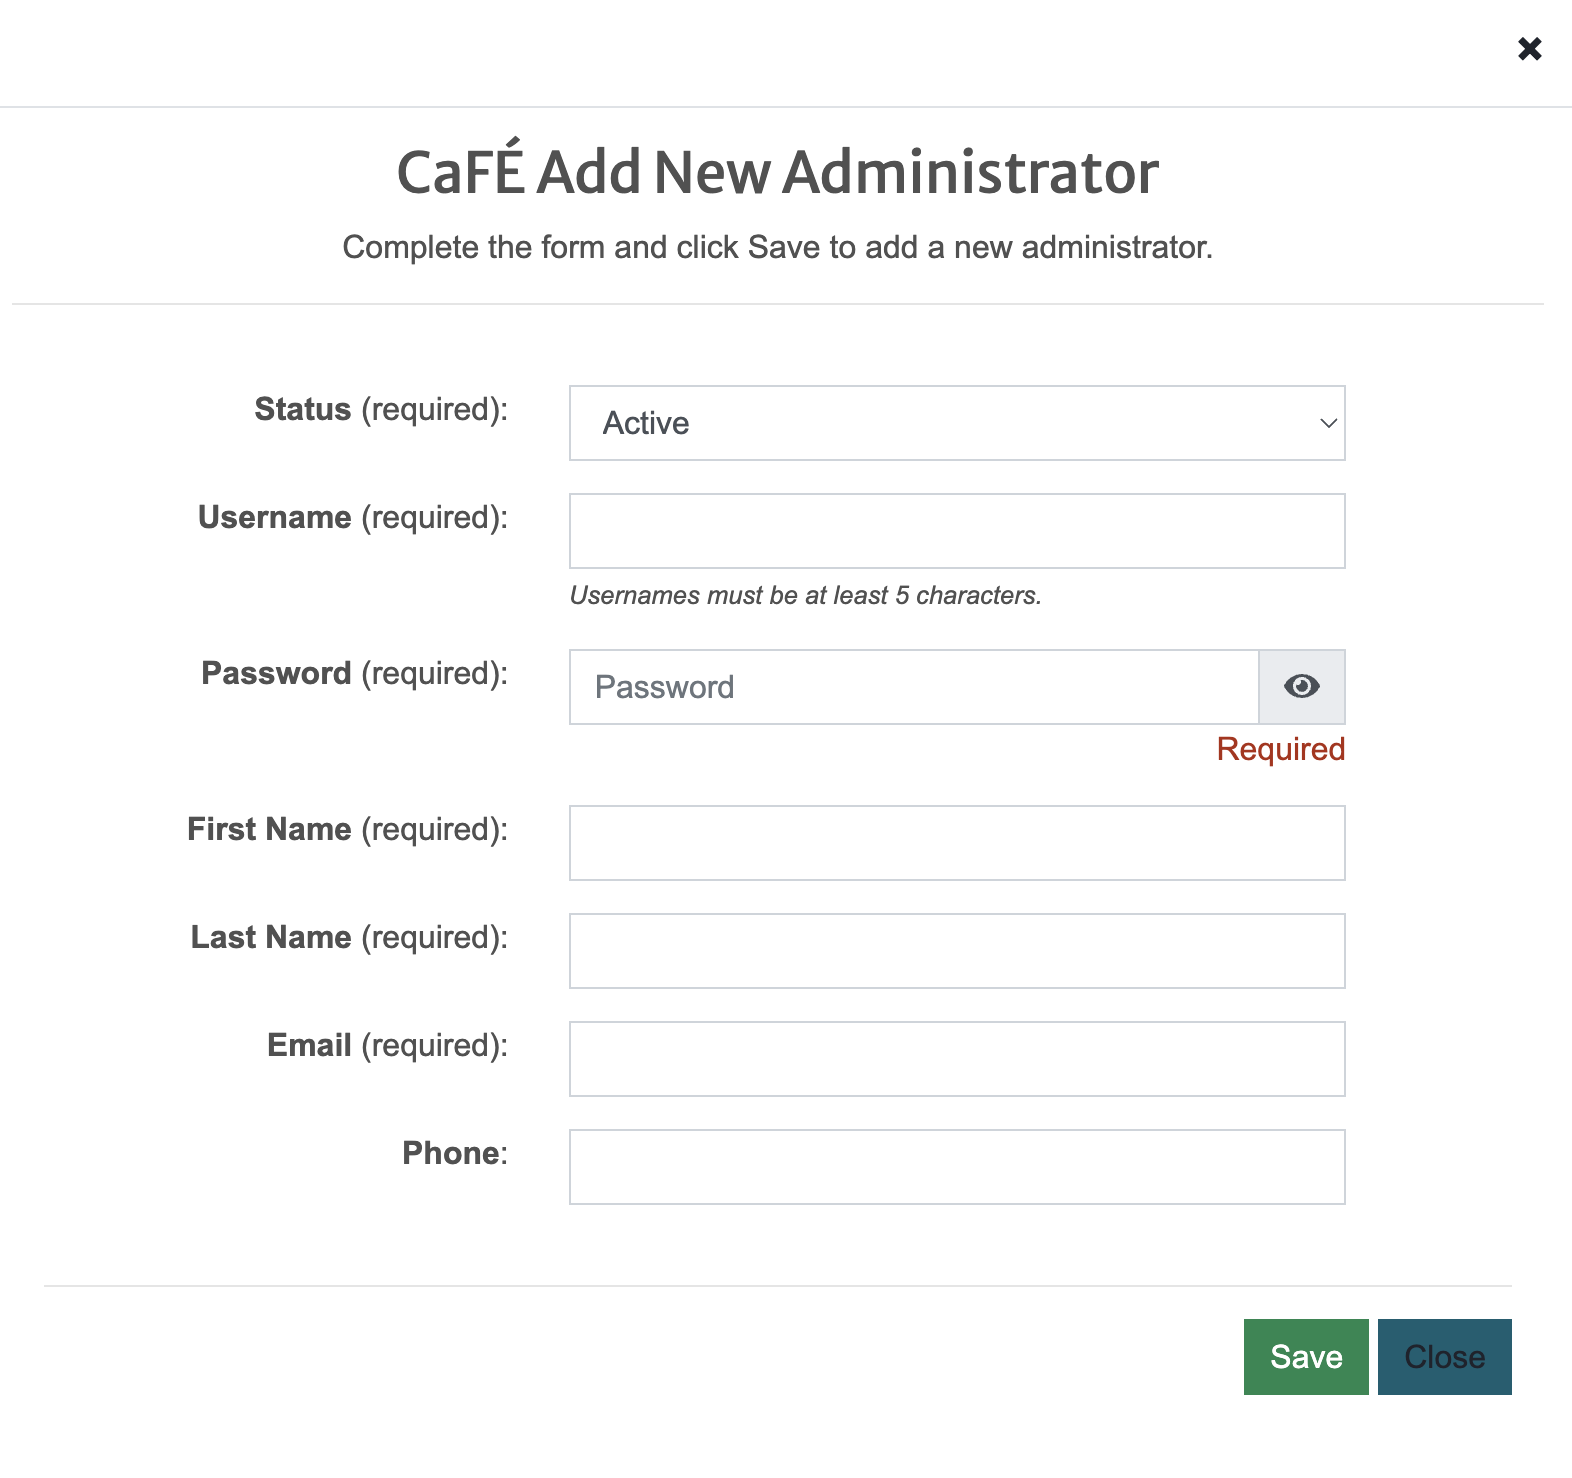
- Click Add New.
- Enter the new administrator details. Note: Enter a temporary password to create the administrator account. Do not share this password by email.
- Click Save to save the new account.
- Share the username you created with the new administrator.
- Instruct the new administrator to set up a password by entering their email address and username under Forgot Password on the Admin Login Page.
- The system will send a link for them to set up a new password.
Note: A maximum of four (4) general administrators may be created per licensee. If you have more than four, you will need to deactivate a current administrator before creating a new one.
How to Deactivate a General Administrator:
- Log into your CaFÉ account.
- Click on the account icon next to your name in the top-right corner.
- Click Profile.
- Click the Account Users tab.
- Locate the account from the list and click View.
- Change the Status to Inactive.
- Click Save.
- All deactivated user accounts can be found by clicking on Show Deactivated Users from the Account Users page.
Profile Details
View and edit your contact details, login information, and multi-factor authentication settings in the Profile Details page.
How to Update Your Contact Details:
- Log into your CaFÉ account.
- Click on the account icon next to your name in the top-right corner.
- Click Profile.
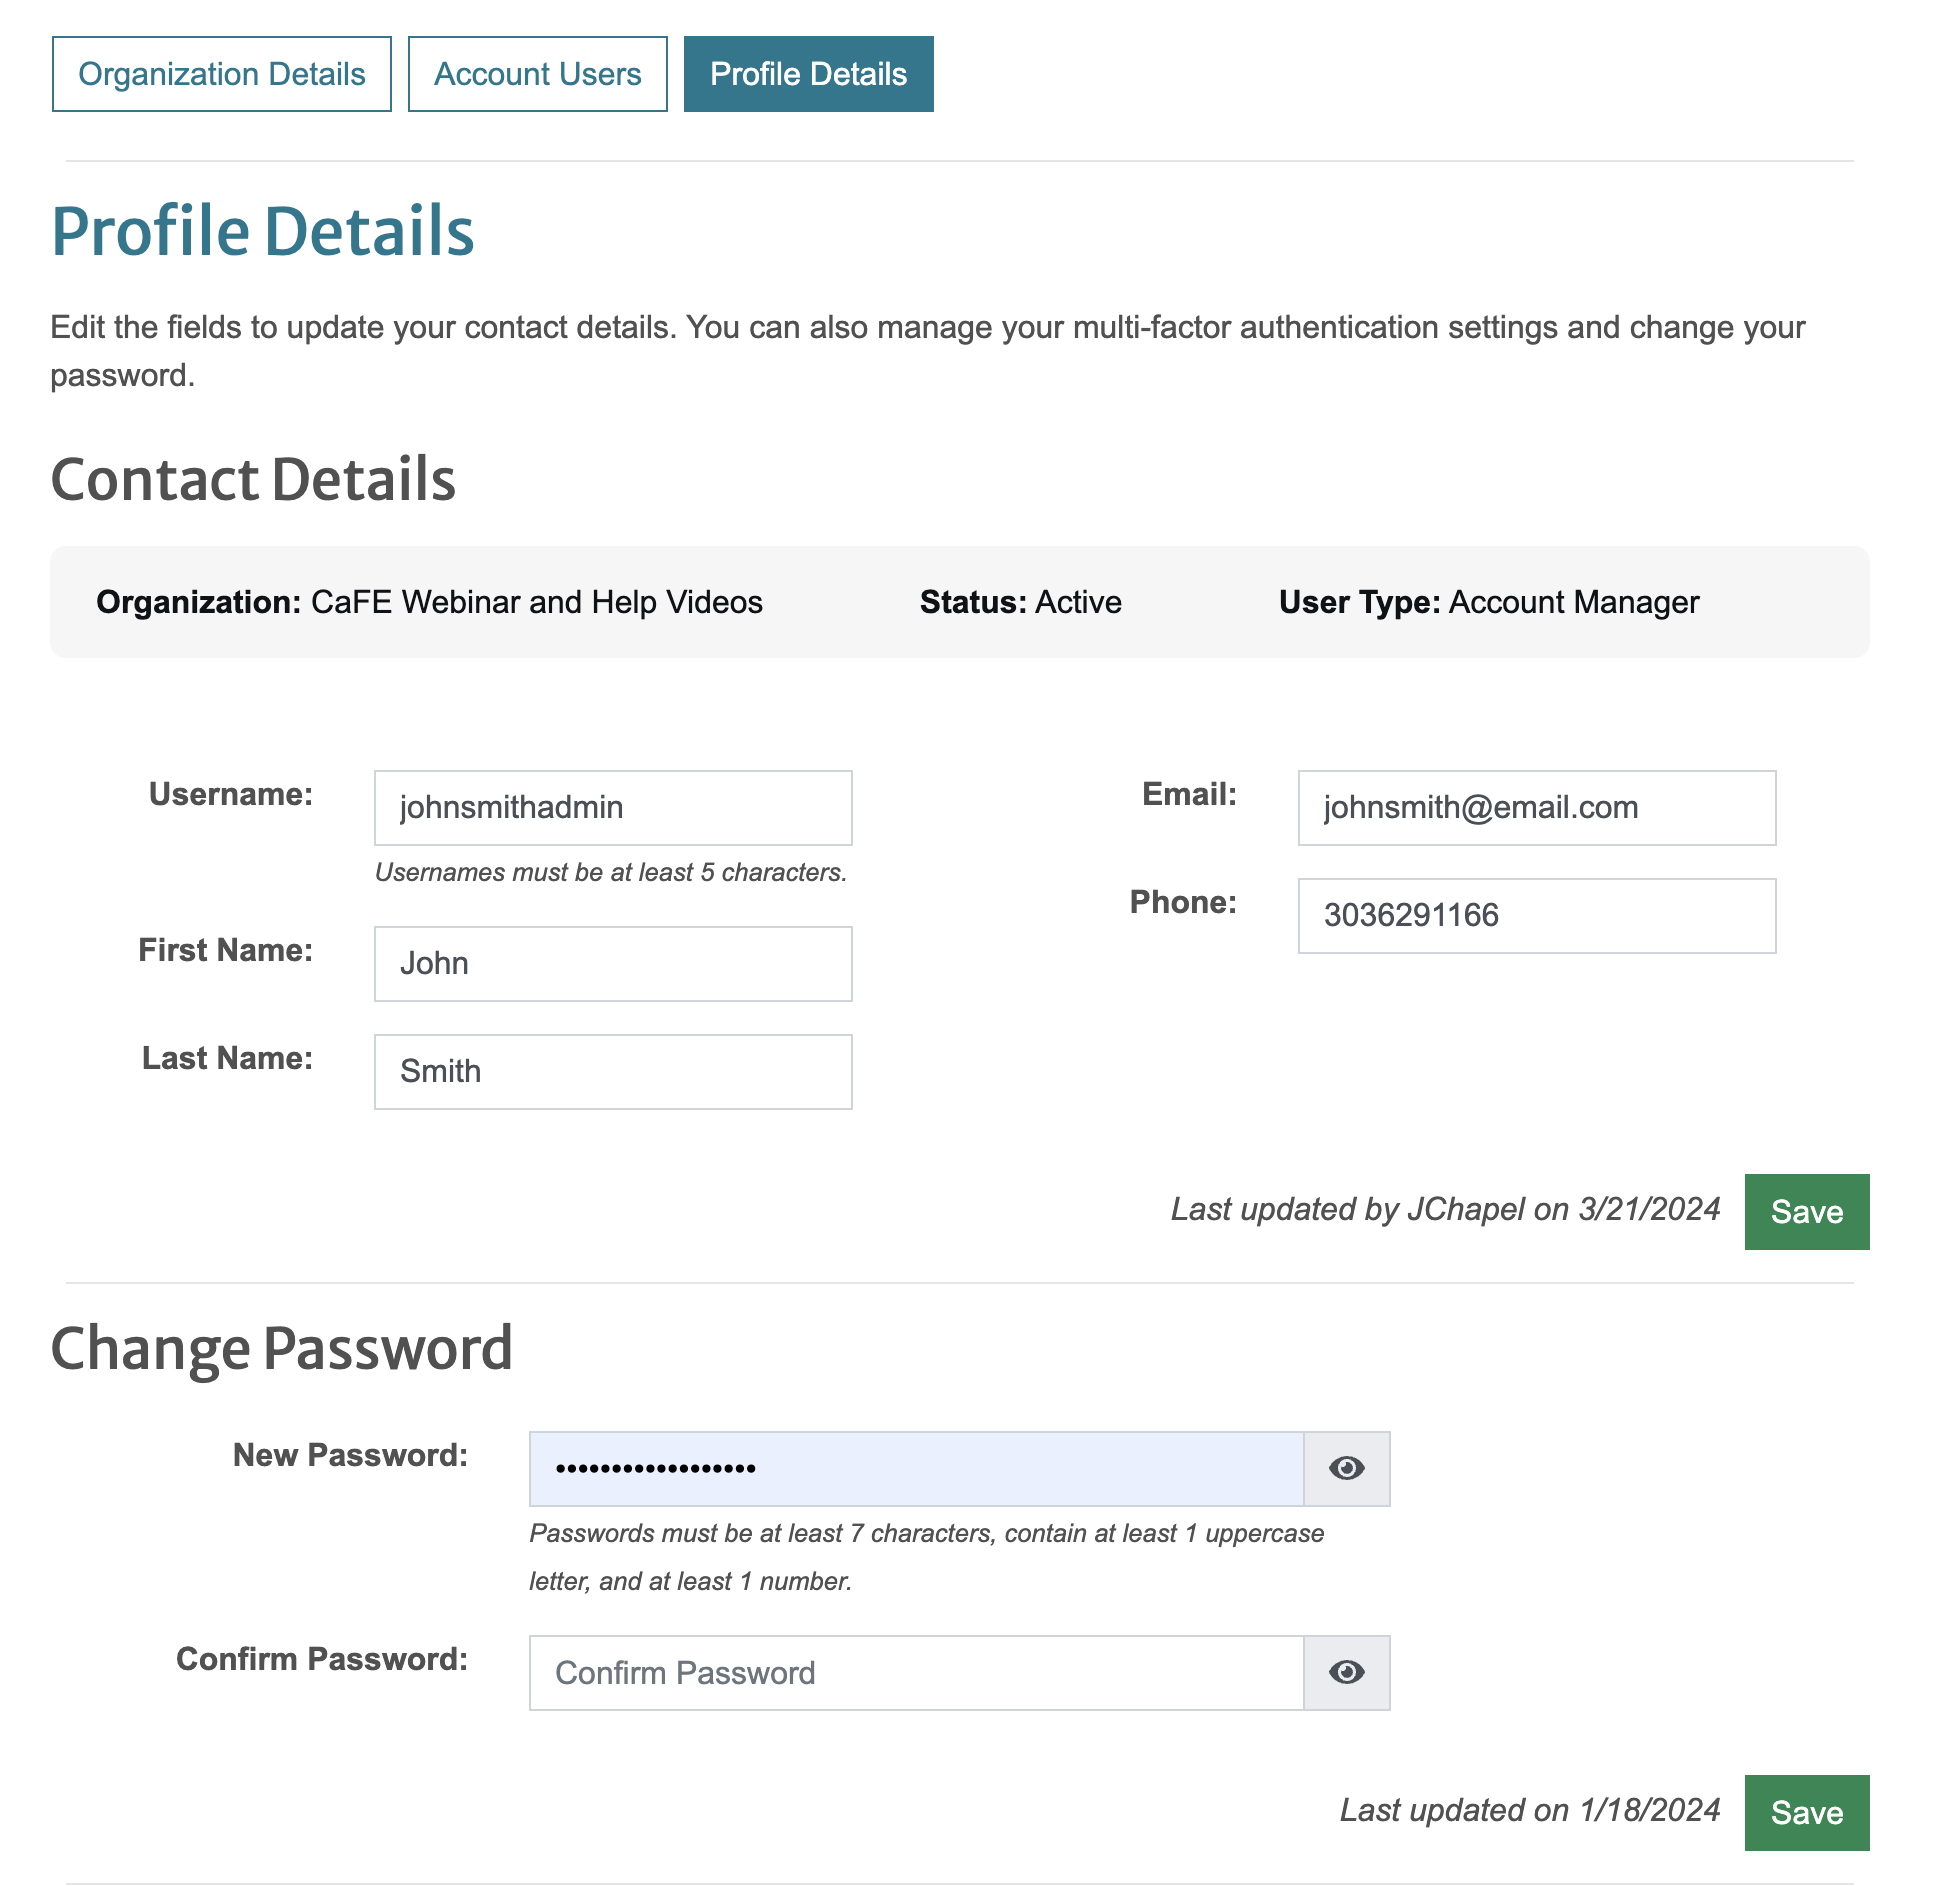
- Click the Profile Details tab.
- Edit the fields to update your contact details.
- Click Save to save the changes.
How to Change Your Password:
- Log into your CaFÉ account.
- Click on the account icon next to your name in the top-right corner.
- Click Profile.
- Click the Profile Details tab.
- Enter a new password in the New Password and Confirm Password fields. Note: Passwords must be at least 7 characters, contain at least 1 uppercase letter, and at least 1 number.
- Click Save to save your new password.
Hover over the blue (+) icons to view the details of each field:
View or edit the username for your account.
Your email address will be used to contact you about your account and notify you of important system information.
Click save to update your account details.
Enter and confirm a new password to change your password.
Click save to update your password.
How to Enable Multi-Factor Authentication (recommended):
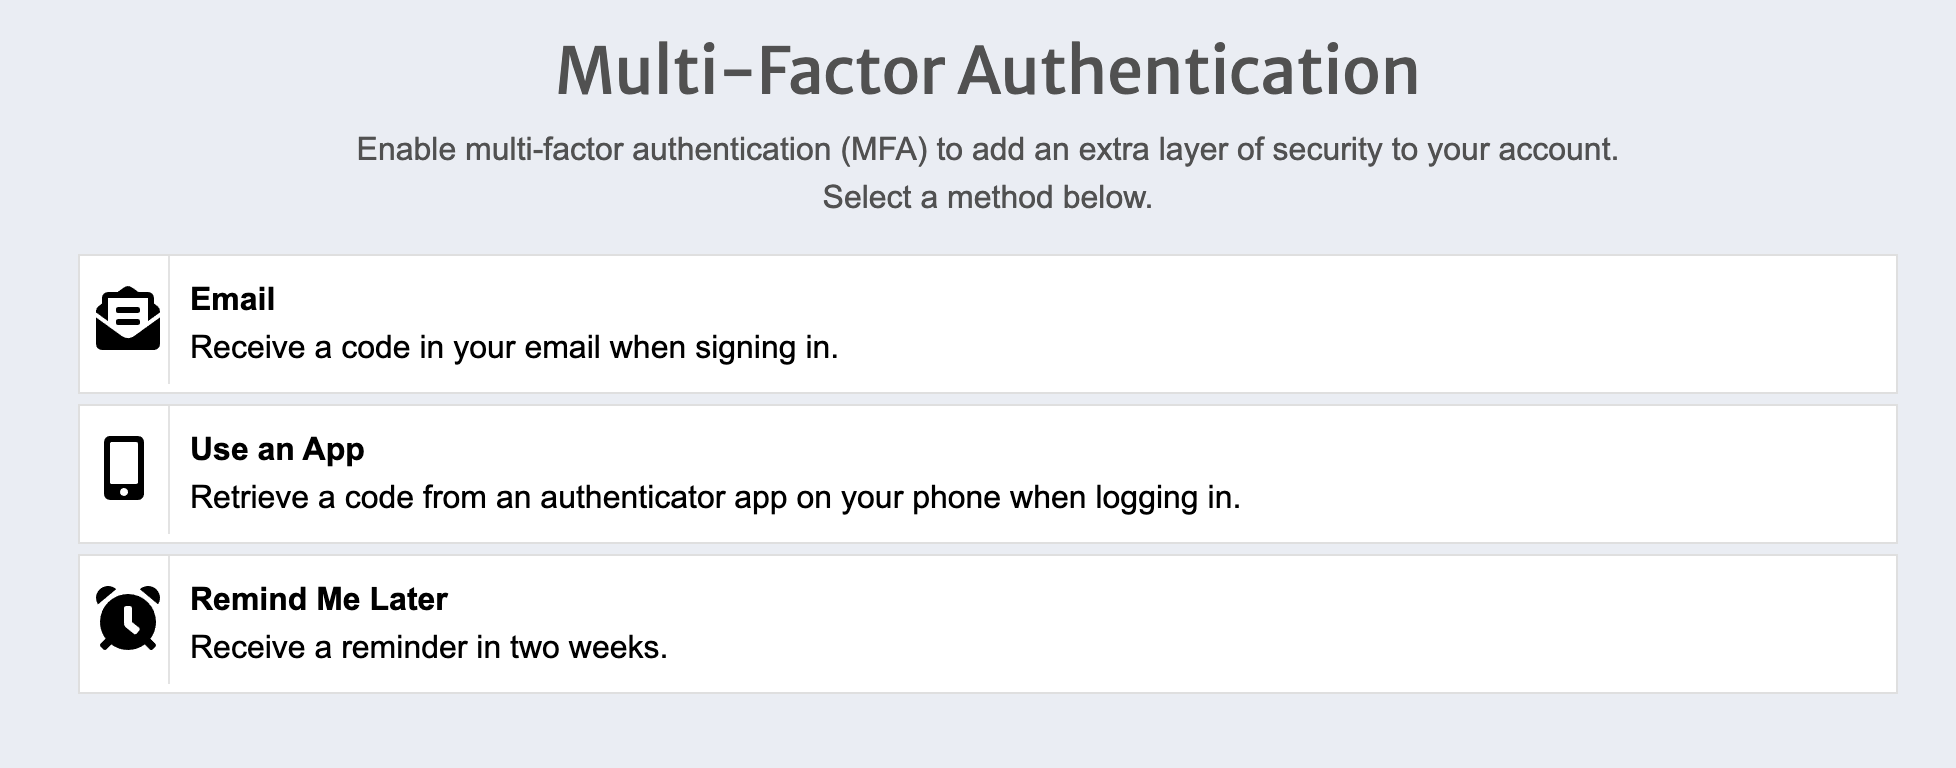
By setting up Multi-Factor Authentication (MFA), you add an extra layer of security to your CaFÉ account. When MFA is enabled, you will log in by first entering your password and, when prompted, typing a dynamically generated verification code provided by email or an authenticator app of your choice.
-
- Log into your CaFÉ account.
- Click on the account icon next to your name in the top-right corner.
- Click Profile.
- Click the Profile Details tab.
- Select the method you prefer to have the authentication code delivered to you.
- Follow the instructions linked below for instructions on how to set up each MFA method:
Note: If you do not want to set up multi-factor authentication, you can select Remind Me Later to get a reminder in two weeks.
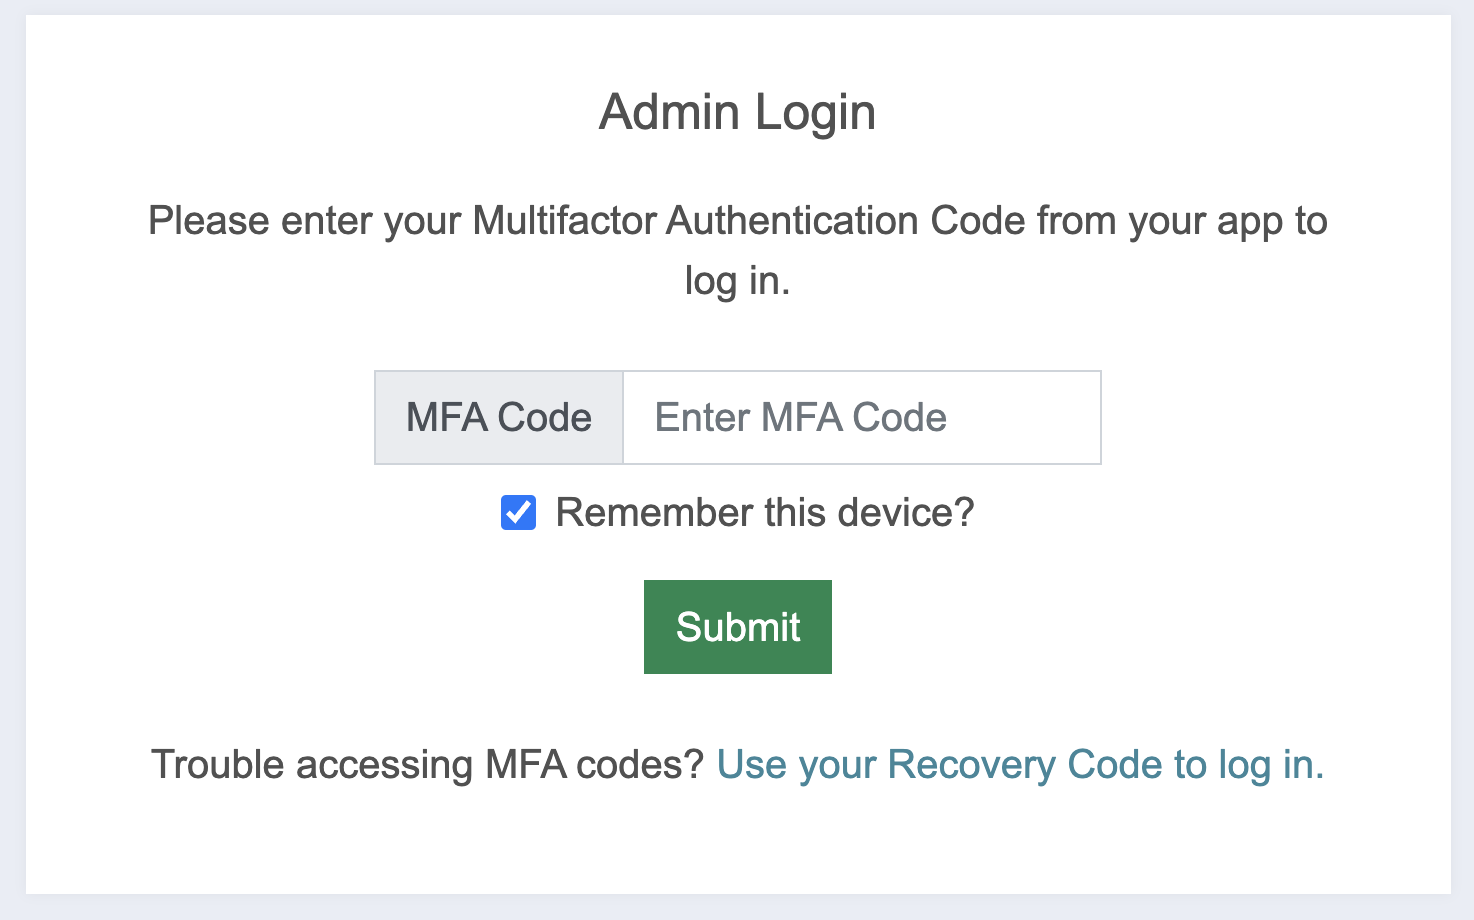
How to Log In Using Multi-Factor Authentication:
- Log in to admin.callforentry.org with your username and password and click Log In.
- When prompted, enter the MFA code that was sent to your email or authenticator app.
- Select Remember this device? if logging in from a trusted device (such as a computer or browser that only you use). It will then only prompt you to enter your MFA code on the same device every 90 days.
- Note: You can remember one CaFÉ account (such as your administrator or juror account) per device. We suggest you select Remember this device? for the account you use more frequently.
- Select “Remember this device?” if logging in from a trusted device (such as a computer or browser that only you use). It will then only prompt you to enter your MFA code on the same device every 90 days.
- Click Submit.